

Home | Explore | Slackline Yoga | Slackline Setup

3x Oval Key Lock Locking Carabiners
1x Line Lock
2x 6 ft Anchors
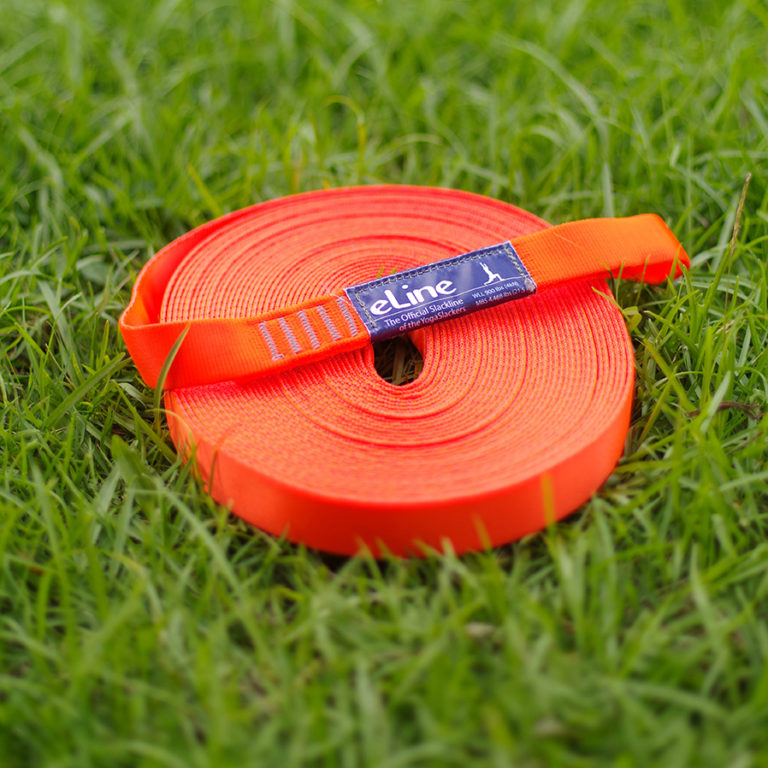
1x 50 ft eLine webbing
2x Oval Key Lock Non-Locking Carabiners
1x Line Lock
1x 6 ft Anchors
1x 50 ft eLine webbing
2x Velcro (to hold in place your DIY tree pro)
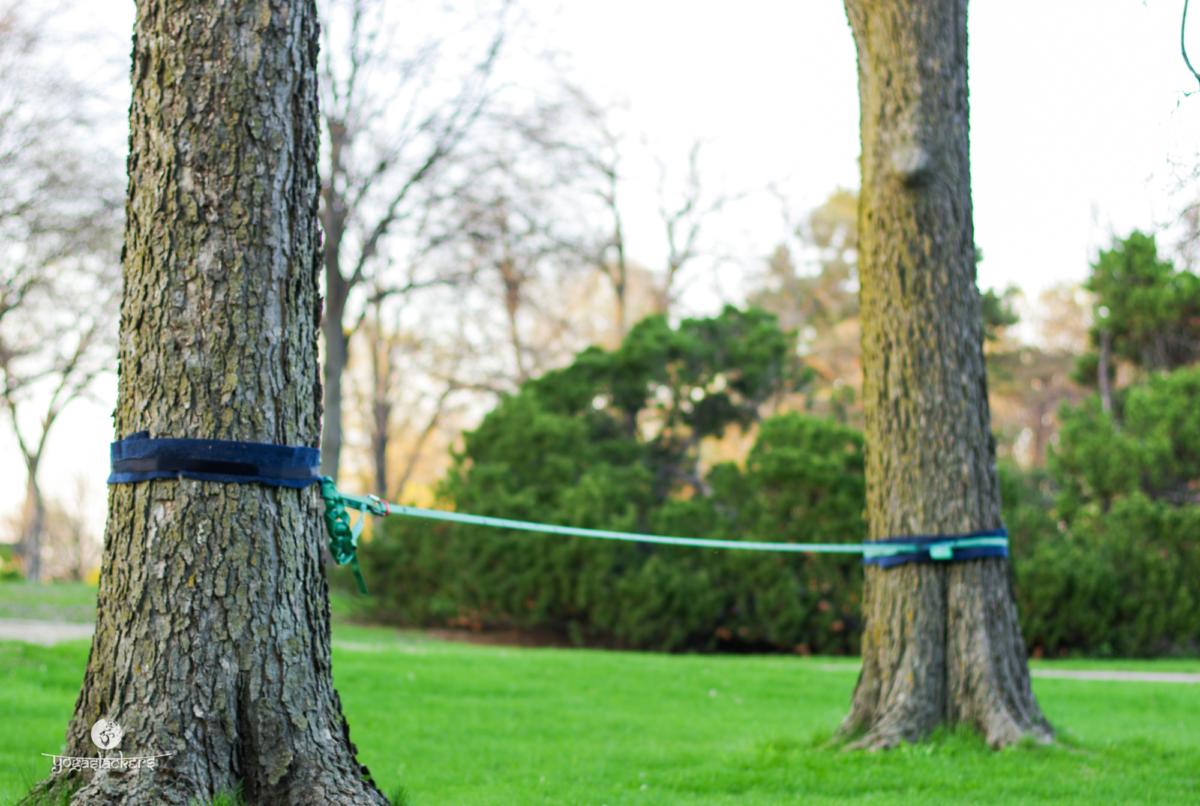
1) Choose the right trees
2) Install the Tree Pro
3) Place an anchor on each tree
Girth hitch each tree with an anchor. To help keep the line flat, pinch the webbing (folding it in half) at the point where it passes through the loop. This will prevent the line from turning sideways.
4) Attach carabiners
Attach a carabiner to the loop end of each anchor.
5) Attach the slackline webbing to one anchor using a carabiner.
Locate the loop side of the slackline webbing. Attach the webbing and anchor with a carabiner. Lock the carabiner and walk the slackline webbing to the other side making sure that the line stays flat and does not twist.
6) Continue following the steps listed above to create the tensioning system.
7) Before slacklining, make sure that all your carabiners are locked.
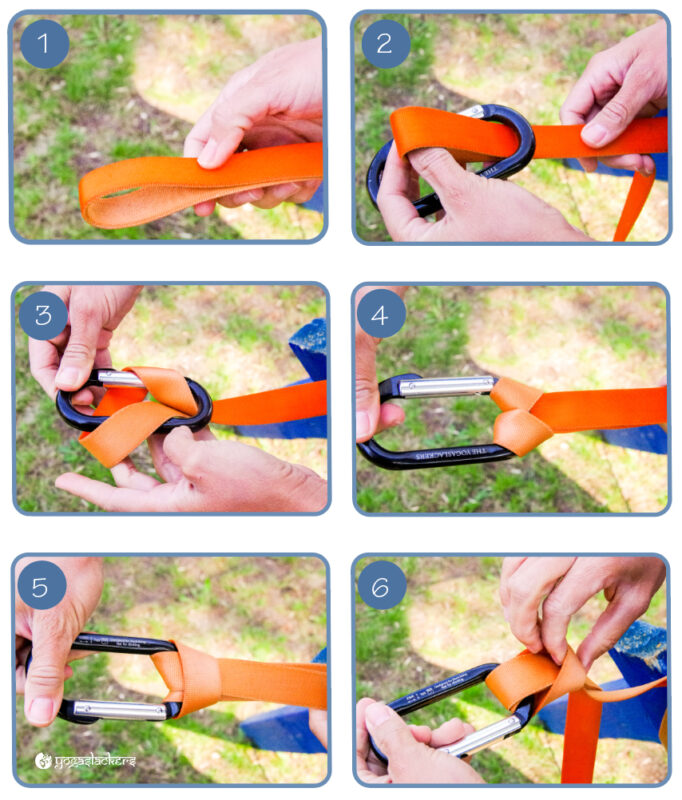
Line locks are amazing little pieces of gear. Yet they are so easy to loose. If you are missing one, simply follow the instructions on these images to continue slacklinining without them.
To avoid losing line locks during storage and transport, we suggest attaching the line lock to a carabiner as soon as its removed during derigging. Then attach the carabiner to the sown loop of your webbing.
In the next session we share our favorite methods to safely store and transport slackline gear.
If you have the 108ft eLine webbing or any long slackline and you are packing with size constrains, we recommend rolling your line into two different coils. That way if you decide to just use part of your line, you don’t have to undo the entire coil.
Simply unloop that last end that you pulled through, and then continue pulling – all of the other loops will undo themselves. A good daisy chain should become completely undone with some pulls, without leaving any knots behind. If you always start with the ends then it’s easy to know which side to undo first, in this case the side with only loops.
If your daisy chain does not immediately come undone easily, try to undo it from the other side.
If that doesn’t work remove the last loop, and pass the webbing around the next loop in the opposite direction. It will make sense once you see it and do it a few times! Whatever you do, avoid undoing it one link at a time. Your time is priceless!
Depending on the situation, rigging indoors can be as easy as using a column as a “tree” or as complex as having to reinforce a wall and install plates. Whenever you decide to rig off any structure (trees included) your first question should be: is this strong enough to withstand the forces created while slacklining? If the answer is no, maybe, or I don’t know, then do not do it.
While we don’t want to discourage you to rig indoors, we do want to encourage you to seek professional help while doing so. Here are some indoor rigging examples. Some easier than others.
If the area you would like to set your line has any exposed columns or beams that are solid, you are in luck! Make sure these columns are load bearing and can withstand the pull forces. If they move even a tiny bit do not set your lines there. Small columns, small deck poles, or decorative columns are not appropriate. You could easily pull down the entire structure and the roof associated to it if you set up on a structure that is not strong. When in doubt ask an engineer.
The setup on strong columns and beams is exactly the same as using trees. Make sure you still use tree protection, in this case, to protect your gear from any sharp corners or edges that could easily cut and damage your webbing.
Consider the landing zone. Install puzzle mats of at least 1 inch of thickness underneath the slackline. Acrobatics mats are also suitable as they provide cushioning from falls without compromising the stability of the ground. Bouldering pads (crash pads), mattresses or any other surface that is too soft will not be suitable as it can de-stabilize your step and cause ankle injury.
You could install a wall anchor in many different ways. While deciding what method to use you should keep the end goal of creating a 5 to 1 safety standard. Each side in the setup should have a 1000 lbs WLL (working load limit) or 5000 lbs MBS (minimum breaking strength). If this does not mean anything to you, ask for a professional assistant while creating a wall anchor.
The setup will differ considerably depending on if you are installing in cement blocks, solid concrete, wood, i-beams, or drywall. The examples presented here should help you understand what is possible. We recommend you use an engineer while installing any of these.
Installing concrete fasteners requires the understanding of sheer vs pull out ratings, which again are beyond the scope of this website. It also requires knowledge on equalizing forces, as often one bolt is not enough to withstand the forces of slacklining. Here we present you with enough information for you to speak with professional installers more effectively.
Expansion bolts: Expansion bolts or expansion anchors are designed for anchoring into concrete or cement.
Titanium Glue-Ins: Are the new standard bolts used in outdoor climbing. A must if bolting permanent anchors outside or in corrosive environments such as pools. ½” or 13mm bolts is becoming industry standard.
Concrete Screws: these work best when you have a large plate and a weaker base, as the help spread the load out.
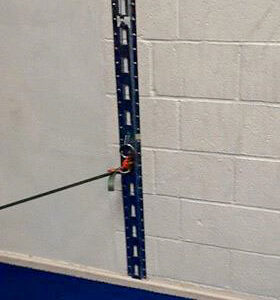
E tracks: A metal plate utilized for keeping cargo, equipment and even vehicles tied down during transport. (2000 lbs WLL)
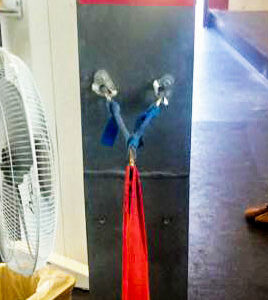
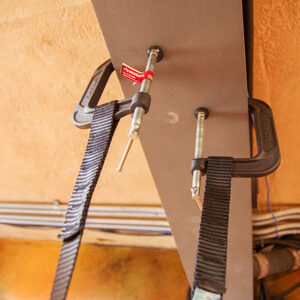
There are a number of building that have Vertical I-beam construction, beam clamps are a great way to add slacklines to these spaces.
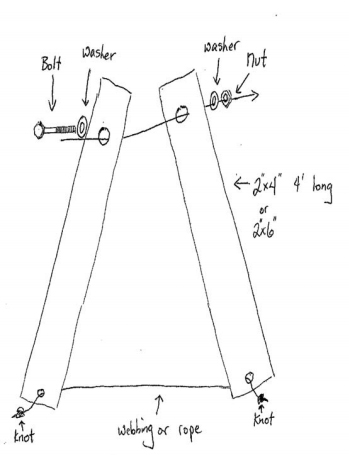
You can vary the width of the bottom of the X-frame (thus varying the height) simply by wrapping the cord around the end of the legs of the frames once or twice (make sure the cord is long enough to provide you with 3 or 4 height options).
NOTE: We do not recommend surfing or jumping on xframes lines.
The installation is very similar to installing an xframe. The major difference being that instead of wrapping the webbing around the frame, the sling is wrapped on either side of the head and a shackle is used to connect the hang sling to the anchor and the webbing.
Ground anchors are a way to create a slackline setup pretty much anywhere. The ground anchor you choose will differ tremendously depending on the location of the setup. Indoor rigging differs greatly from outdoor rigging. In outdoor rigging situations, the substrate will dictate the best anchor to use. The answer to ‘which anchor is best suitable for this setup?’ will always be: ‘It depends’. It depends on many factors: do you want a permanent installation, semi-permanent, what is the substrate, what obstructions are buried in the area?
Installing ground anchors indoor and outdoors should not be taken lightly. Electric, gas and water installations can be hidden underneath the ground. ALWAYS check with the local authorities before nailing, digging or disturbing the ground. Never forget or skip this step as it could be a deadly or costly mistake.
The strength and stability of any ground anchor depends on the soil components and the direction of pull. Make sure you understand your system before installing any of these. The following ground anchoring systems are provided as examples of what is possible. Please seek assistance from a qualified instructor before installing them for the first time.
As a general rule avoid straight up pull on ground anchors. The smaller the angle (closer to parallel to the ground) the more resistance the anchor can provide.
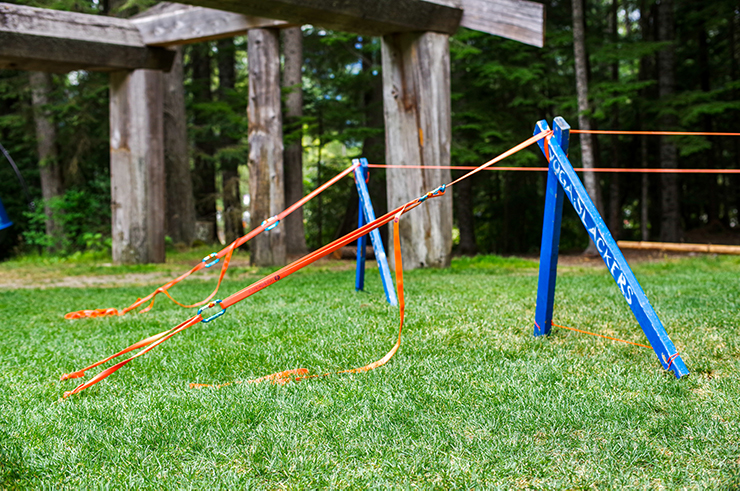
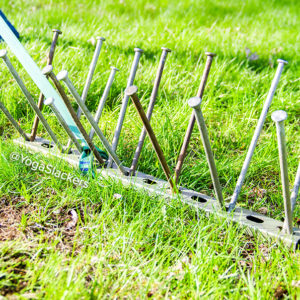
A slacker staple is a ground anchor built by nailing a flat metal or wood piece to the ground. A long time ago, in a galaxy not far from here, we showed up to a festival and we were informed that we could not use trees. This forced some of the best quick thinking that we have done to this day. After a few brainstorming sessions and a lot of walking back and forth on the brightly lit aisles of a hardware store, we came up with the ground anchoring system that we use to this day. While we have modified the materials used through the years, the basic configuration stays the same.
This is a non-permanent and minimally intrusive setup ideal for grassy areas. We use this setup when limited by how deep we can nail or disturb the ground.

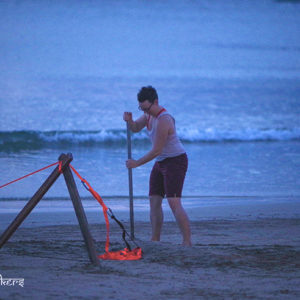
A deadman anchor is a buried object like a log, sandbag or rock. Its strength depends on the size of the anchor, the depth buried and the packing quality of the soil. Deadman anchors work well in snowy and sandy conditions where trees or rocks are not readily available.
This anchoring system has been used for years by climbers and canyoneers. It is relatively simple to create and allows you to build an anchor in soft areas where nailing something to the ground would not be useful. Plus, you can often find the necessary materials on site.

The arrowhead anchor is a permanent ground anchor. It is easier to install than a deadman and can be equally strong. The type of soil will determine the size of the arrowhead, but the installation will remain the same.