Ground anchors are a way to create a slackline setup pretty much anywhere. The ground anchor you choose will differ tremendously depending on the location of the setup. Indoor rigging differs greatly from outdoor rigging. In outdoor rigging situations, the substrate will dictate the best anchor to use. The answer to ‘which anchor is best suitable for this setup?’ will always be: ‘It depends’. It depends on many factors: do you want a permanent installation, semi-permanent, what is the substrate, what obstructions are buried in the area?
Installing ground anchors indoor and outdoors should not be taken lightly. Electric, gas and water installations can be hidden underneath the ground. ALWAYS check with the local authorities before nailing, digging or disturbing the ground. Never forget or skip this step as it could be a deadly or costly mistake.
The strength and stability of any ground anchor depends on the soil components and the direction of pull. Make sure you understand your system before installing any of these. The following ground anchoring systems are provided as examples of what is possible. Please seek assistance from a qualified instructor before installing them for the first time.
As a general rule avoid straight up pull on ground anchors. The smaller the angle (closer to parallel to the ground) the more resistance the anchor can provide.
Slacker Staple
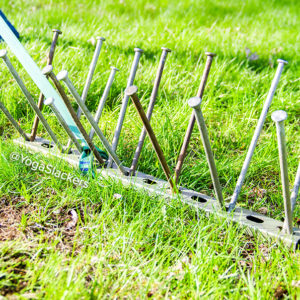
A slacker staple is a ground anchor built by nailing a flat metal or wood piece to the ground. A long time ago, in a galaxy not far from here, we showed up to a festival and we were informed that we could not use trees. This forced some of the best quick thinking that we have done to this day. After a few brainstorming sessions and a lot of walking back and forth on the brightly lit aisles of a hardware store, we came up with the ground anchoring system that we use to this day. While we have modified the materials used through the years, the basic configuration stays the same.
This is a non-permanent and minimally intrusive setup ideal for grassy areas. We use this setup when limited by how deep we can nail or disturb the ground.
Unistruts are available at your local hardware store. Search for them in the electrical aile. They come in 10 ft long pieces that you will need to cut into 20 inch to 24 inch sections. A hack saw will do the trick.
10 inch nails may work depending on the type of ground
1x Hammer per friend you can convince to help you set the xframes.
Tip a 2.5 to 5 lb sledge hammer works the best.
Installation Instructions
Secure the anchor webbing on the unistruts at 2/3 of the bar. With the shorter side closer to the line.
Place the unistrauts next to each other on parallel lines pointing towards your slackline. Separate the point of the unistrat closest to the line by 12 inches and the point further to the line by 24 inches. You can use your nails to determine this distance. This will help equalize the pull along the entire strut on each side.
Starting with the holes nearest to the anchor webbing, place 2 nails per hole facing away from each other and at a 20 to 30 degree angle. Your goal is to ‘grab’ as much width of ground as possible. Therefore nails pushed straight down are not effective for this type of setup.
Hard ground may allow you to skip every other hole. Softer ground will require all the holes to be filled and therefore more nails, or longer unistrut and more nails too.
Steel Tent Stakes
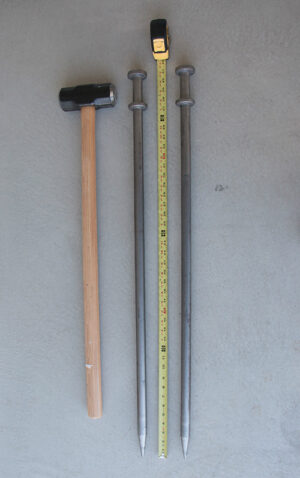
These should be at least 3 ft long. You read correctly: 3 feet long or around 1 meter. These are not the stakes used for camping. These are the stakes used while securing large tents. While they are relatively simply to install and quite strong, these stakes require some serious pounding to place and remove.
Pound each stake to the ground on a 60 degree angle facing away from the slackline pull.
Secure an anchor strap around the protruding end.
Follow the instructions on how to set an xframe.
Deadman Anchors
A deadman anchor is a buried object like a log, sandbag or rock. Its strength depends on the size of the anchor, the depth buried and the packing quality of the soil. Deadman anchors work well in snowy and sandy conditions where trees or rocks are not readily available.
This anchoring system has been used for years by climbers and canyoneers. It is relatively simple to create and allows you to build an anchor in soft areas where nailing something to the ground would not be useful. Plus, you can often find the necessary materials on site.
Materials Necessary
Object to be buried
Since the strength of the deadman anchor depends on the perpendicular cross-sectional area of the object that is buried, you should search for a log or piece of wood that is at least 3 feet long and 6 inches wide. A broomstick-like (long and skinny) piece of wood will not work. Search for a wide log around 6 inches in diameter or at least a 4×4 or 2×6 piece of wood.
Webbing Anchor
An anchor strap or rope that is long enough to go around the anchoring object and have enough tail to stick out of the ground when buried.
Shovel or digging device
Installation Instructions
Dig a trench where you would like your ground anchor to be placed.
Tie a webbing loop around the log long enough to stick out of the dirt.
Place the log in the trench and bury it. Being careful not to bury the webbing entirely.
Make sure to compact the soil. If working with sand, adding water and stepping on it repeatedly will help strengthen the setup.
Helix Anchors
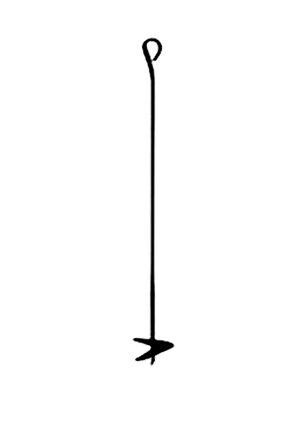
Similar to a deadman anchor this anchoring system is perfect for sandy locations. It consists of a long metal stake with a spiral plate at the bottom. Helix anchors if placed in soft ground are easy to install and remove.
(You may need more if the anchors are shorter or depending on the weight of the soil)
Installation bar
Installation Instructions
Place the anchor on the ground in the same direction of pull you will set your slackline.
Install by utilizing a screwing movement while pushing the anchor into the ground. You may need an additional rod to help with leverage.
Pack the earth around it as you would on a deadman anchor.
Arrowhead Anchors
No trees? No problem.
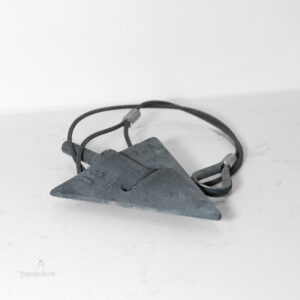
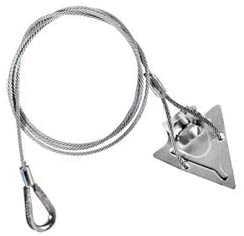
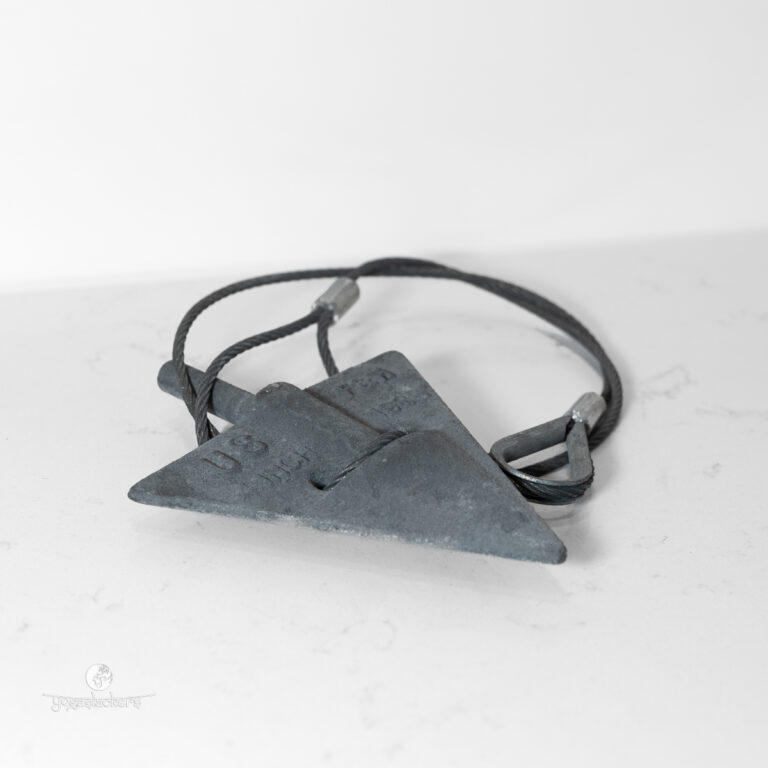
An arrowhead anchor is a simple ground anchor that allows you to install a slackline where traditional tree anchors are not available. Compared with burying a deadman anchor, an arrowhead is faster and easier to install while still creating a strong, low-profile anchor point.
Arrowhead anchors work particularly well with X-frame slackline setups and can be used for permanent backyard installations in non-rocky soil or temporary setups in areas such as sandy beaches. The type and condition of the soil will affect the anchor’s holding power and may determine the appropriate anchor size, but the basic installation process remains the same.
Determine the Direction of Pull: The arrowhead anchor should be driven into the ground in the same general direction as the pull of the slackline. Before beginning, determine where your xframe and anchor will be positioned and visualize the direction the slackline will pull when tensioned.
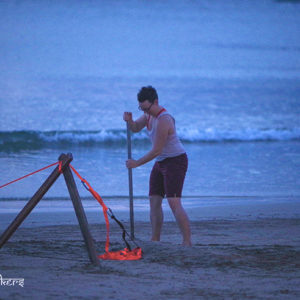
Position the Arrowhead: Place the hollow driving rod over the arrowhead anchor. Position the anchor at approximately a 60-degree angle in the direction of pull.
Drive the Anchor into the Ground: Using a sledgehammer, drive the arrowhead anchor into the soil as deeply as possible. Keep in mind that the steel cable will move upward when the anchor is initially tensioned and set into position. If you want the cable to sit flush with the ground, dig a small hole approximately 1 foot deep (0.3 m) before beginning the installation.
Remove the Driving Rod: Once the anchor has reached the desired depth, carefully remove the driving rod from the ground.
Set the Arrowhead: Firmly pull upward and in the direction of load on the exposed cable. This rotates or “sets” the arrowhead underground, allowing it to engage the surrounding soil and create the anchor point. You can use the tensioning system of your slackline to aid in the process. Create tension and pull until the cable no longer move upwards. Once that is done, you will be ready to use the anchor for slacklining.
Note for Temporary Installations: Removal will require digging down to the anchor rather than simply pulling it back through the soil.
Buy Now
This product has multiple variants. The options may be chosen on the product page