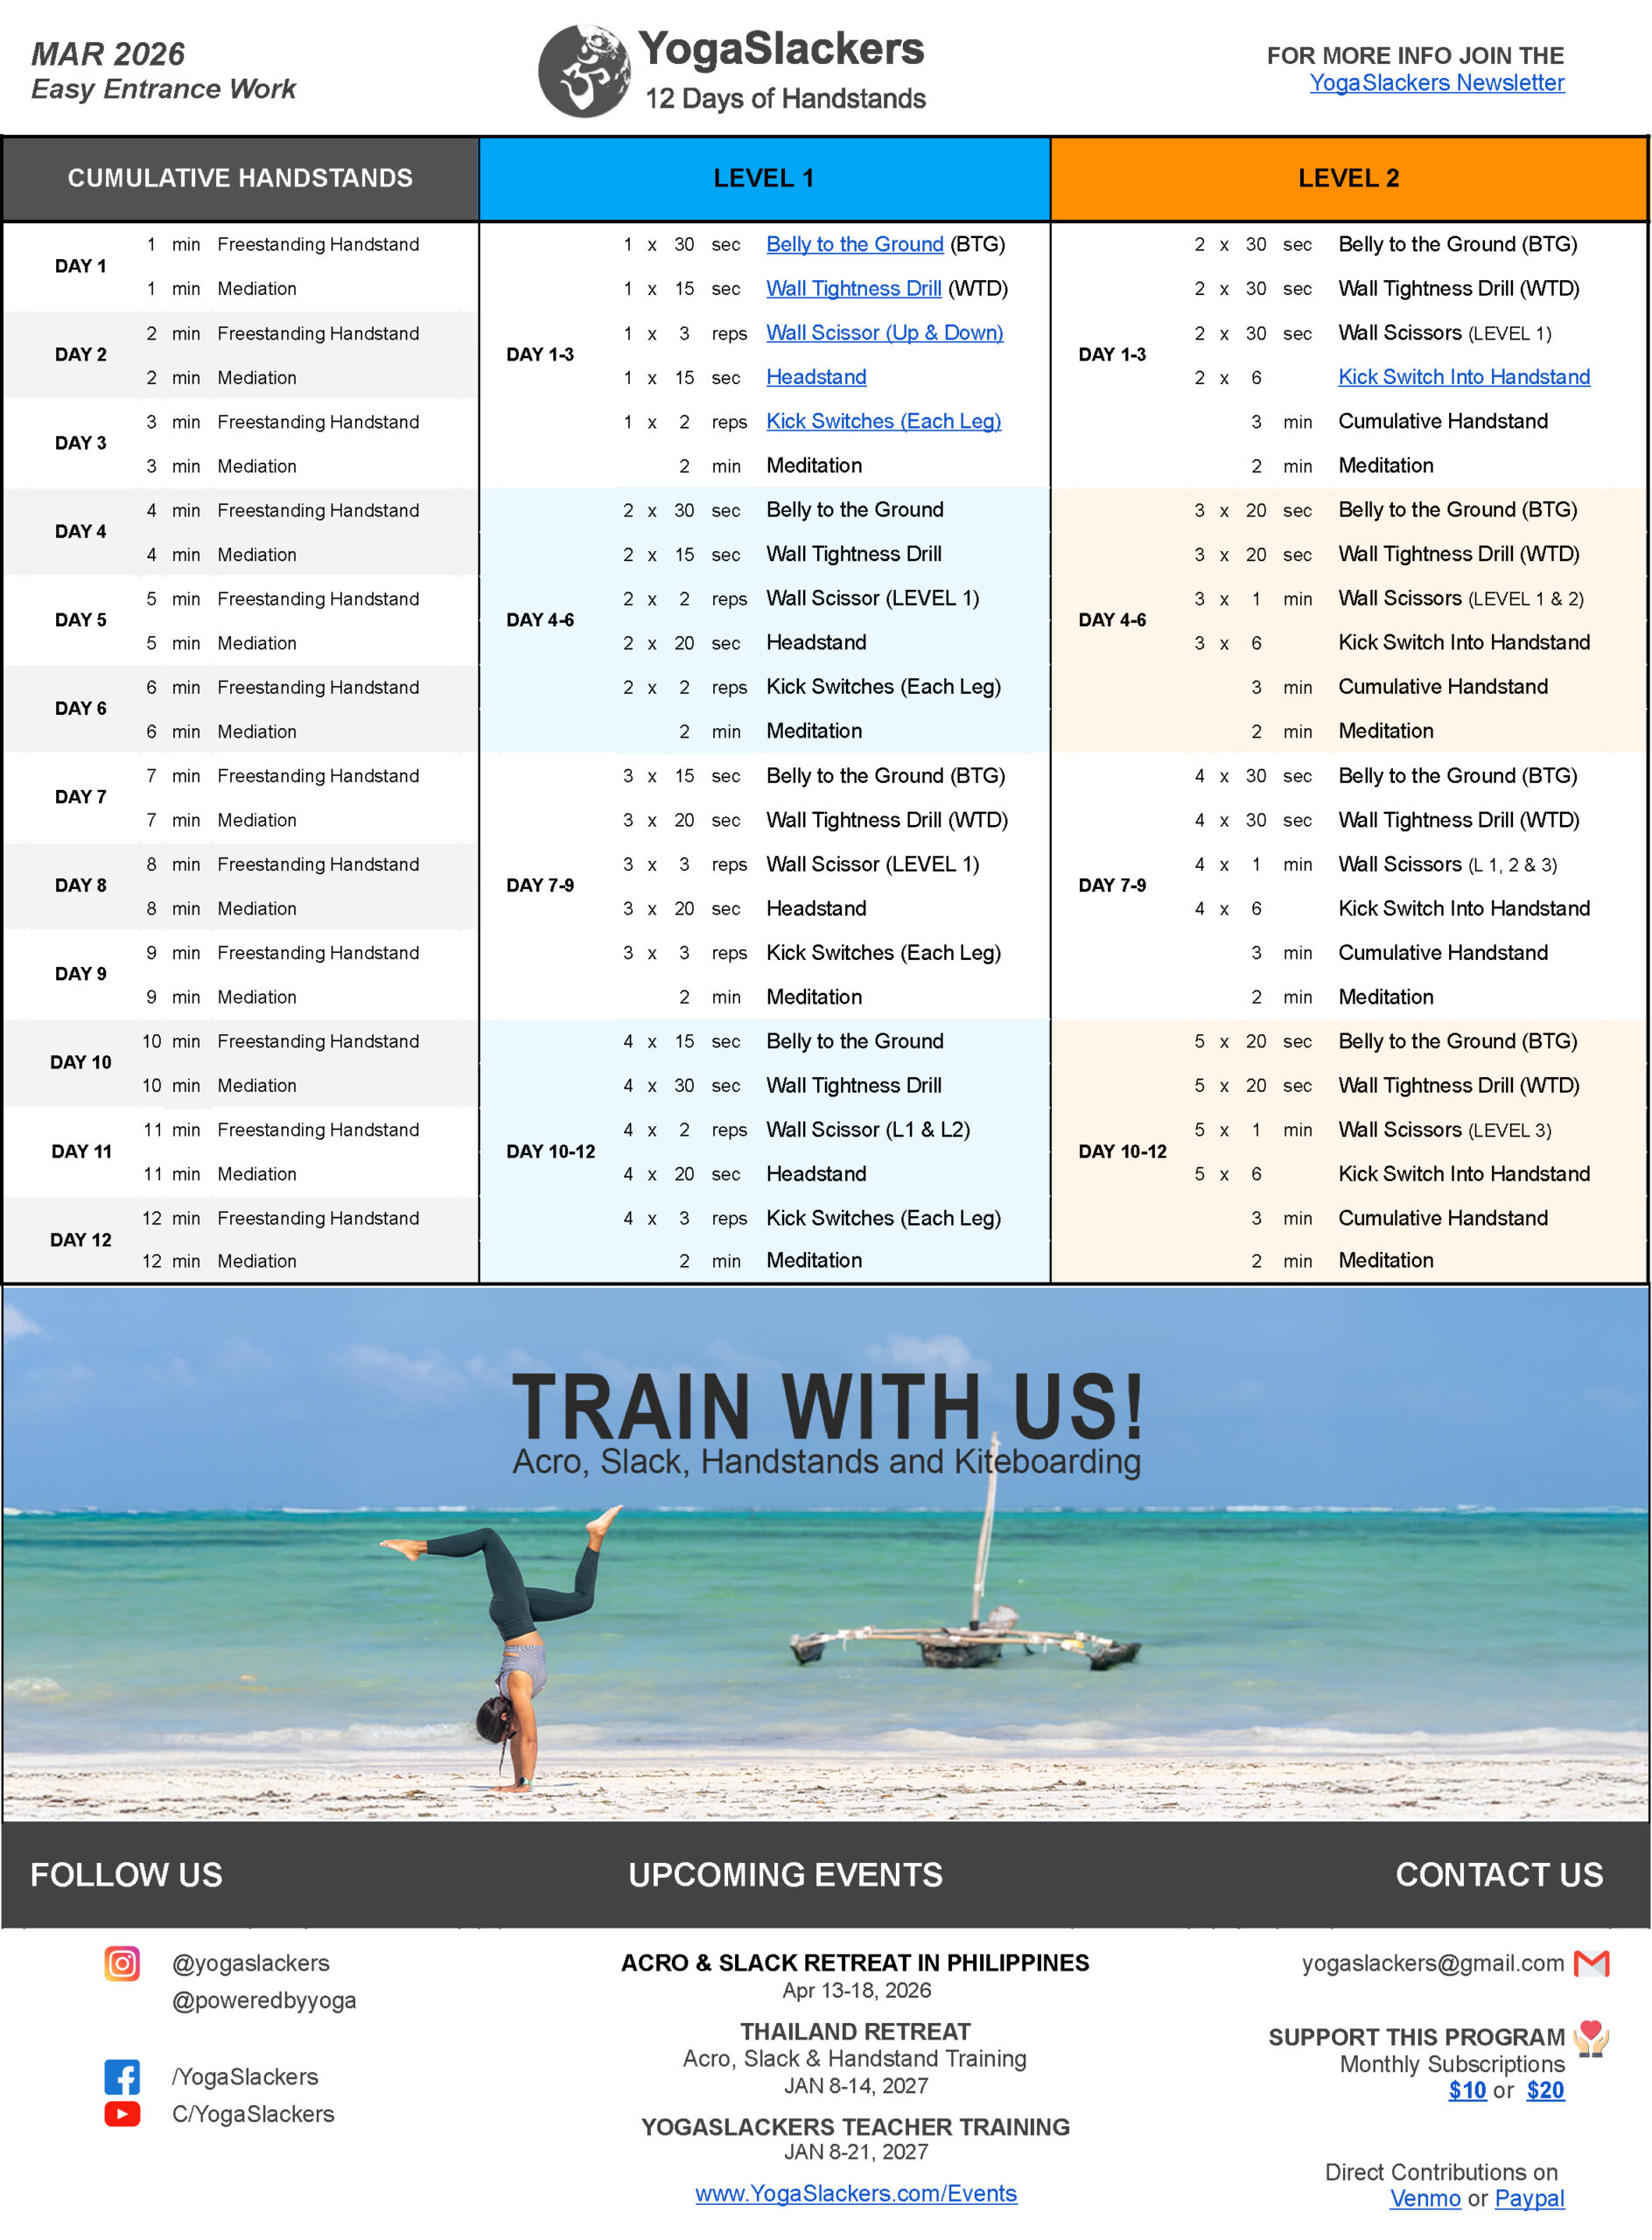
Two things that determine the quality of your handstands are how you get up and how stable you are once you’re there.
If your entrance feels rushed or inconsistent, your balance usually follows. And if you never quite find straight, the handstand can feel like constant effort instead of something you’re actually standing in.
That’s why this month’s training is all about one of the easiest – and most comfortable – entrances there is: the kick switch.
Kick switching into a handstand feels fairly natural. It loosely mimics the movement pattern of walking. One leg goes up, the other leg follow, they met in the middle before returning to the ground one leg at a time.
During Kick Switches, the idea is to use the strength of the kicking leg to bring the hips up, while the extended leg provides leverage.
There is, however, a small caveat with this entrance. It’s very easy to think that the top (extended) leg leads the movement, and suddenly we’re back to thinking “feet up.” Instead, remember that we want to lift from the hands to the feet, not the other way around.
Start by placing your hands on the ground, with your forearms and shoulders aligned. Use blocks against your forearms to help you with this alignment. From there, visualize the entrance is going to help you move the ribs up first, followed by the hips, and then the legs, in that order. Resist the urge to throw the legs up and let everything else lag behind.
The kick switch drill is a great reminder that easy doesn’t mean sloppy. If you’re newer to this entrance, the goal isn’t getting all the way up. It’s finding a floating sensation. Kick with one leg, let the second leg float up, switch, land softly, and start the next drill with the other leg. Over time, this builds timing, coordination, and lightness. When reading the training program, note that one kick per leg counts as a set.
If you already have some handstand stability, the focus shifts slightly. Aim to move all the way into your straight line in one smooth action. Pause briefly to confirm that you arrived in balance, then come down leading with the opposite leg. Switch the leading leg, and start again. Give yourself a handstand hold goal before coming down. This could be a breath, saying up or counting to 5. What ever it is, use it as a sign that you are in a balanced handstand before coming down.
Before focusing on your entrances, do the wall work! The wall tightness drill reinforces the shape we’re aiming for once we’re upside down, and the wall scissors drill will help you feel the alignment, body control, and how to slow down the tendency to fall toward your fingers or toward the heels of the hands.
Use your time on the ground and on the wall to inform your freestanding practice. And feel free to pause and add more wall work if the freestanding drills don’t feel effective yet. I like to think that the wall drills should feel hard! And the freestanding drills easier. Since the goal of the wall drills is to make the freestanding work feel noticeably easier.
But, as always, the goal isn’t perfection, it’s progress. Enjoy the process, keep it playful, and share even a small glimpse of your practice if you can.
If you’re enjoying this program, please consider contributing monetarily to help keep it going. All contributions go directly toward supporting my work and making sure we can continue offering training programs for the wider community.
Happy upside-down time,
Raquel